Struggling with low water pressure in the shower? You're not alone! Many people face weak water flow due to flow restrictors in showerheads. These devices are designed to save water, but sometimes they can affect the shower experience.
In this article, we'll explain what a flow restrictor is, why you might want to remove it, and the steps to do so. Whether you're seeking better water pressure or a more enjoyable shower, keep reading for helpful tips.
What is a Flow Restrictor in a Shower Head?A flow restrictor is a small component inside the showerhead that limits water flow to reduce usage. Designed for water conservation, it ensures your shower uses less water while still providing an effective rinse. In many modern showerheads, the restrictor keeps the flow rate between 2.0 to 2.5 gallons per minute (GPM), helping households save water and lower their utility bills.
Why You Might Want to Remove a Flow RestrictorImproving Shower ExperienceIf you have low water pressure, a flow restrictor might make your shower feel weaker. Removing it increases the water flow, providing a stronger, more satisfying stream. This is particularly helpful during colder months or after exercise, when you want a more powerful water flow to relax and warm up faster.
Time-saving BenefitsStronger water flow doesn’t just feel better; it can also save you time. With increased pressure, rinsing off shampoo and soap becomes faster and more efficient. If you often find yourself spending more time in the shower, removing the restrictor could help speed up the process and make your routine more efficient.
Step-by-Step Guide: How to Remove Flow Restrictor from Shower HeadStep 1: Turn Off the Water SupplyBefore you do anything, it’s crucial to turn off the water supply. You don’t want water spraying out of the showerhead while you're working on it. If you skip this step, you'll likely end up soaking yourself and making a mess. To turn off the water supply, look for the shutoff valve, typically located near the shower or in the bathroom's main water line. Turning off the water ensures you won’t have any surprises while you’re removing the showerhead and flow restrictor.
Some showerheads may also have a small valve located directly on the shower arm, but it's always safest to turn off the main water supply to avoid any leaks or accidents.Step 2: Remove the ShowerheadWith the water turned off, it’s time to remove the showerhead. You’ll need pliers and a wrench for this step. Start by using pliers to grip the base of the showerhead. Be gentle, as applying too much pressure can scratch or damage the surface. Once the showerhead is loosely unscrewed, use a wrench to help finish loosening the connector. Be sure to place a cloth or towel between the wrench and the showerhead to prevent any damage or scratches.
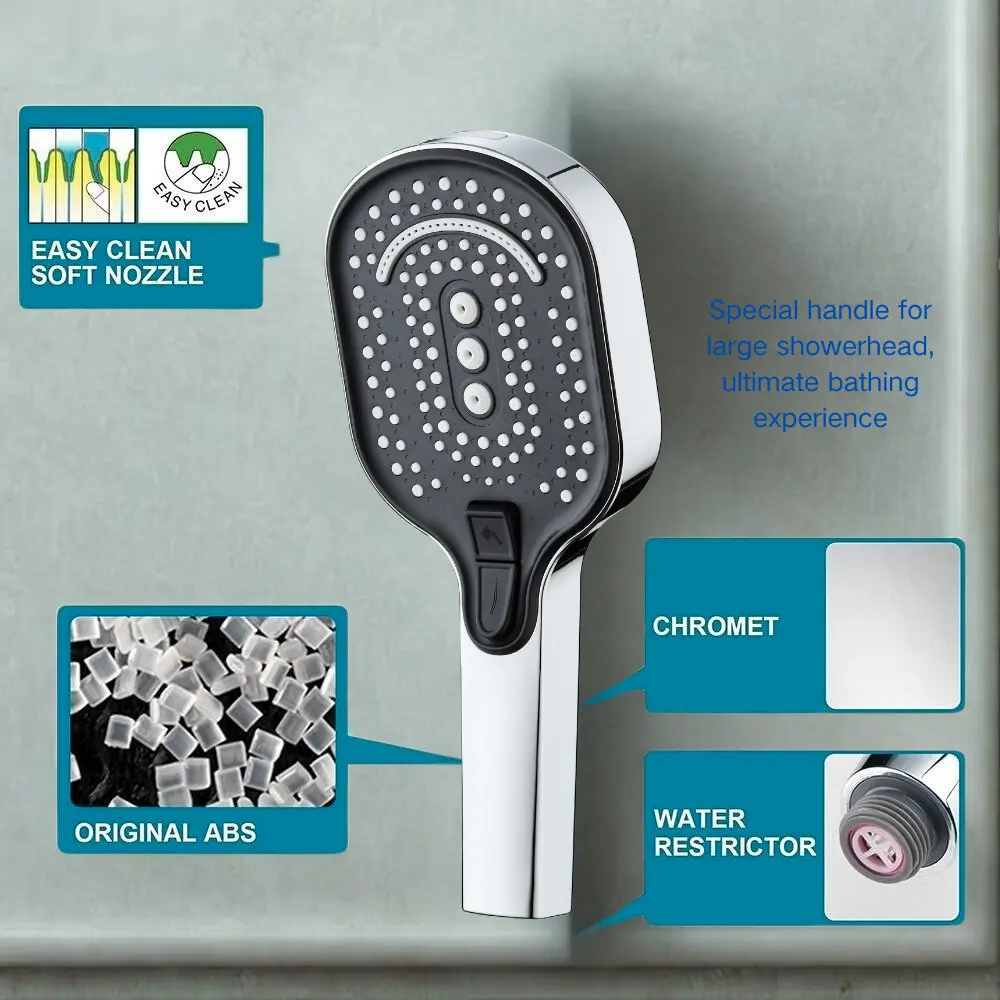
When removing the showerhead, twist counterclockwise to unscrew it. If the showerhead is stuck, a little extra muscle might be needed, but be cautious not to force it too much. If necessary, try gently rocking the showerhead back and forth to loosen it. After removing the showerhead, check for any gaskets or washers that may have come loose as well.Step 3: Locate the Flow RestrictorNow, the real work begins. With the showerhead removed, you’ll need to locate the flow restrictor. It’s usually found at the point where the showerhead connects to the shower arm. The restrictor will likely be a small plastic piece, often round in shape, with tiny holes or a mesh grid. Its main purpose is to limit the water flow to meet water conservation standards.
Flow restrictors are often color-coded, typically in green, red, or blue. These colors may vary depending on the manufacturer, but the restrictor itself should be easily identifiable by its flat, disc-like shape. If you're unsure whether you’ve found it, feel around the inside of the showerhead for a small, removable disk. It might be tightly seated, so a little extra effort may be needed.Step 4: Remove the Flow RestrictorOnce you've located the flow restrictor, the next step is to remove it. Grab a small flat-head screwdriver. Carefully insert it into the edges of the restrictor, prying it out slowly and gently. Be sure to work around the edges, lifting the restrictor without damaging the surrounding parts.
If the restrictor is stubborn or tightly lodged inside the showerhead, you might need to use a pair of tweezers to carefully pull it out. Don’t force it too hard, as this could damage the restrictor or the showerhead. If the restrictor has been in place for a long time, it might be stuck due to mineral deposits or grime. You can try soaking the showerhead in a vinegar solution for 10-15 minutes to loosen any buildup before attempting to remove the restrictor again.
If the restrictor seems unusually difficult to remove, take a step back and ensure you’re not using too much force. You can also consult the showerhead’s manual for specific guidance.Step 5: Reinstall the ShowerheadNow that you’ve removed the flow restrictor, it’s time to reinstall the showerhead. First, inspect the inside of the showerhead to ensure it's clean and free of debris. Check the threads on both the showerhead and the shower arm to make sure they're not damaged and are free of buildup. If necessary, clean the threads using a cloth or soft brush.
Once you’re ready, reattach the showerhead by twisting it back onto the shower arm. If you’re concerned about leaks, wrap the shower arm’s threads with some Teflon tape. This will help create a tighter seal and prevent water from leaking around the showerhead. Tighten the showerhead with your hand, then use a wrench to give it an extra snug fit. However, be careful not to overtighten, as this could crack or strip the threads.
Make sure to check for a rubber washer or O-ring at the base of the showerhead. If it’s missing or damaged, replace it before reattaching the showerhead.Step 6: Test the Water FlowWith everything reassembled, it’s time to test your work. Turn the water supply back on and check the water flow. You should notice an immediate improvement in pressure. The water should flow more freely and powerfully, providing a stronger shower experience.
Inspect the connections around the showerhead to ensure there are no leaks. If you notice any water escaping, use your wrench to tighten the fittings slightly, but avoid overtightening. If the water pressure hasn’t increased significantly, there might be another issue, such as a clogged pipe or old showerhead that needs replacing. However, in most cases, removing the flow restrictor will noticeably improve the flow.
Tools You Need to Remove the Flow RestrictorRemoving the flow restrictor from your showerhead is a simple task when you have the right tools. Here’s a list of essential tools you’ll need to get the job done safely and efficiently.Essential ToolsPliersPliers are your go-to tool for gripping and loosening the showerhead. They help you securely hold the showerhead in place while you twist or turn it. Be gentle when using pliers to avoid damaging the surface. Wrap a cloth around the showerhead if necessary to protect the finish from scratches while gripping it.WrenchA wrench is useful for loosening any nuts or fittings that may be holding the showerhead. Place the wrench around the nut, then turn it counterclockwise to loosen it. Be sure to apply steady pressure, not too much force, to avoid damaging the showerhead’s threads or connectors. A soft cloth over the wrench can also help protect the showerhead from scratches during this step.Small ScrewdriverA small screwdriver is essential when removing the flow restrictor. Its slim head helps you gently pry the restrictor from the showerhead. When working with a flow restrictor that’s tightly lodged, a screwdriver can get under the edges to help dislodge it. Use a flat-head screwdriver for better control and precision.Cloth or TowelA cloth or towel is important to protect both the showerhead and surrounding surfaces. Wrap the towel around the showerhead to prevent scratches when using the pliers or wrench. It also helps you grip the showerhead without slipping. Using a soft cloth ensures no damage is done while handling delicate shower components.
We use cookies to offer you a better browsing experience, analyze site traffic and personalize content. By using this site, you agree to our use of cookies.
Privacy Policy